If you’re planning to apply for a U.S. visa, completing the DS-160 form is one of the most important steps in the entire process.
Many applicants feel overwhelmed when they first see the form, but once you understand how it works, it becomes much easier to complete.
In this guide, we will walk you through the DS-160 form step by step and help you avoid common mistakes.
What Is the DS-160 Form?
The DS-160 is an online application form required for most U.S. nonimmigrant visas.
This includes common visa categories such as:
- B1/B2 (Tourist/Business)
- F-1 (Student)
- H-1B (Work)
- J-1 (Exchange)
- E-2 (Treaty Investor)
- L-1 (Intra-company Transferee)
- O-1 (Extraordinary Ability)
In general, applicants for tourist, student, work, investor, and company transfer visas must complete the DS-160 form before scheduling a visa interview.
However, immigrant visa applicants (such as green card applicants) must complete a different form called the DS-260.
In other words:
- DS-160 → Nonimmigrant visas
- DS-260 → Immigrant visas
Before You Start
Before filling out the DS-160, prepare the following:
- Valid passport
- Travel details (if available)
- U.S. contact information (hotel, friend, or employer)
- Work and education history
- A digital photo that meets U.S. visa requirements
For business-related visas such as E-2 and L-1, you may also need detailed company information, such as:
- Company name (exact legal name)
- Date of establishment
- Business address and contact information
- Number of employees
- Employee details (positions and status, if applicable)
- Investment amount (for E-2 visa applicants)
These are just examples. Depending on your visa type and individual situation, additional information may be required.
Tip: The DS-160 form may time out after a short period of inactivity. Make sure to save your application frequently and consider saving a backup file to your computer.
Step 1: Start the Application
To begin your application, go to the official DS-160 website:
https://ceac.state.gov/genniv/
- Select your location (e.g., South Korea)
- Enter the code as shown
- Click “Start an Application” to begin
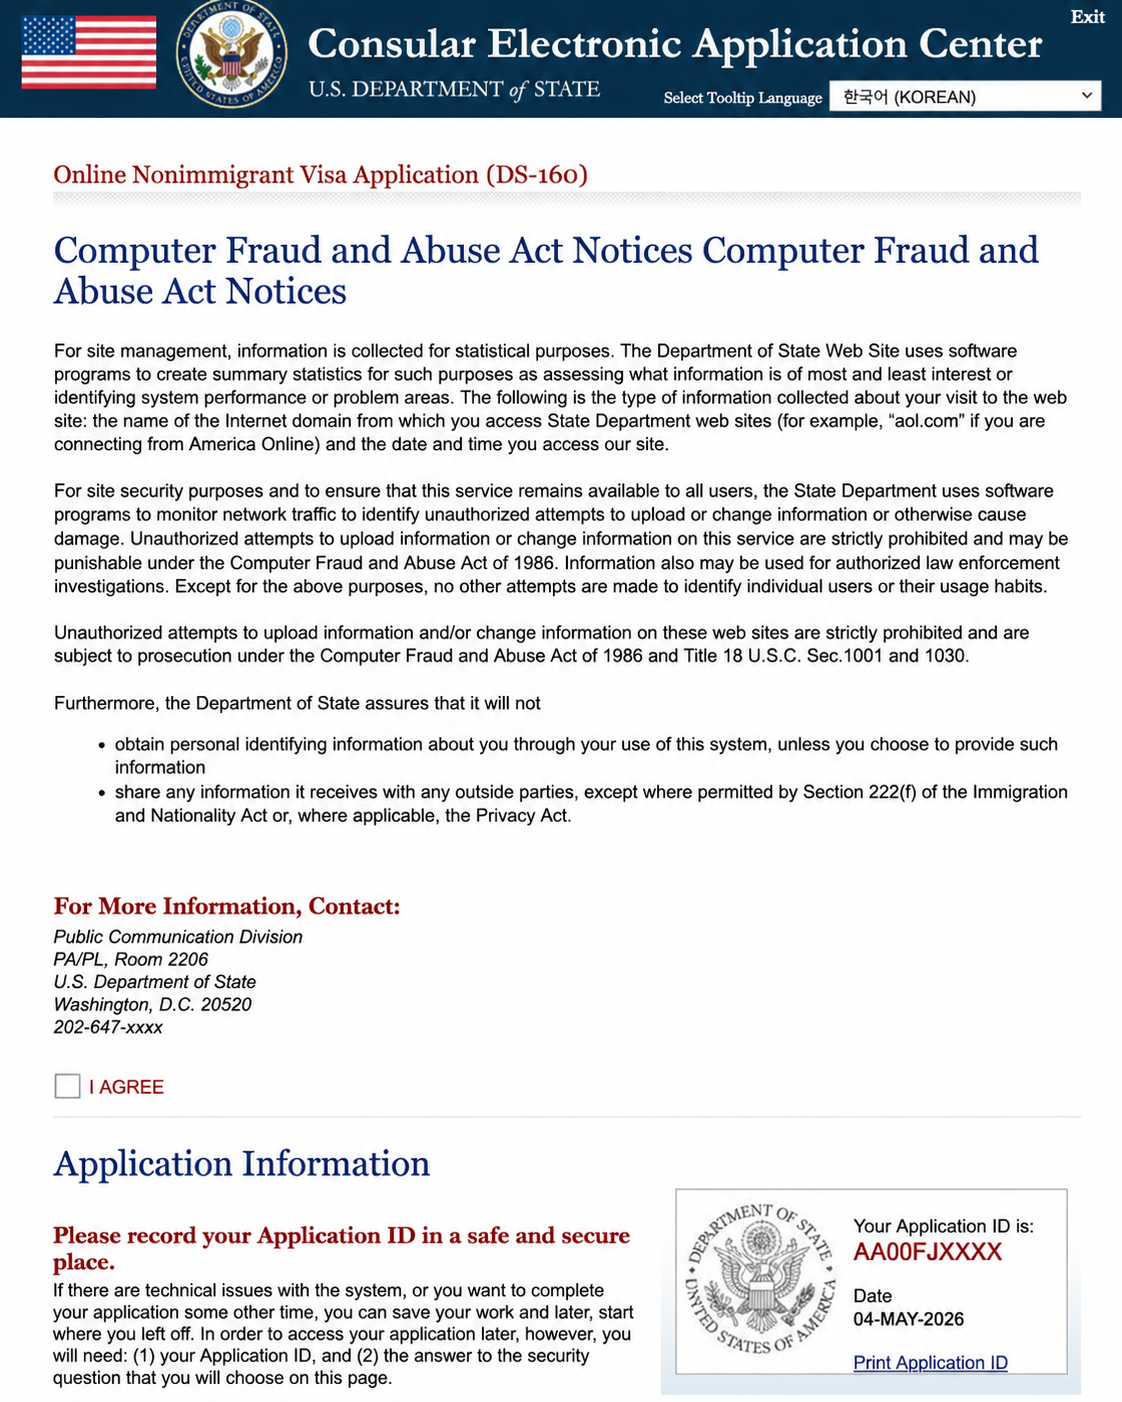
You will receive an Application ID.

On this page, check ‘I Agree’, enter your mother’s maiden name as the security answer, and click ‘Continue’ to proceed.
Write this down or take a screenshot.
You will need it if you return later.
Important:
Make sure to select the correct U.S. Embassy or Consulate where you will attend your interview. This cannot be changed easily after submission.
Step 2: Personal Information
You will enter:
- Full name (exactly as in your passport)
- Date and place of birth
- Nationality
Even small spelling mistakes can cause delays.
Step 3: Travel Information
Provide details such as:
- Purpose of travel
- Intended arrival date
- Length of stay
If you do not have exact travel plans, you can provide estimated dates. This is common and acceptable for most applicants.
Step 4: U.S. Contact Information
You must provide a contact in the United States.
This can be:
- A hotel
- A friend or relative
- A company or school
If you don’t know anyone, you can usually list your hotel.
Step 5: Family Information
You will be asked about:
- Parents’ information
- Spouse information (if applicable)
- Relatives in the U.S. (if any)
Answer honestly and consistently.
Step 6: Work and Education History
Include:
- Current job
- Previous employment
- Education
Make sure it matches your other documents.
Step 7: Security Questions
This section includes yes/no questions about:
- Criminal history
- Immigration violations
- Health and security issues
Always answer truthfully.
Step 8: Business and Company Information for E-2 Applicants
For E-2 visa applicants, the DS-160 may require detailed information about the U.S. business.
You should prepare accurate company information, such as:
- Exact legal name of the U.S. company
- Business address and contact information
- Date of establishment
- Type of business
- Number of employees
- Investment amount
- Applicant’s role in the company
This information should match your supporting documents. Any inconsistency between the DS-160 and your E-2 documents may cause confusion or delays during the visa process.
Step 9: Upload Your Photo
You must upload a photo that meets U.S. visa requirements.
Common issues:
- Incorrect size
- Wrong background
- Poor lighting
If rejected, you can bring a printed photo to your interview.
Step 10: Review and Submit
Before submitting:
- Double-check all answers (must match with all documents such as passport, education records, or employment documents)
- Confirm names and numbers
After submission:
- You will receive a confirmation page with a barcode
Can I edit my DS-160 after submission?
Once submitted, you cannot edit your DS-160 form. However, you can complete a new DS-160 and bring the updated confirmation page to your interview.
This is very important:
- Save it
- Print it
- You will need it for your visa interview
Additional tips:
- You can log back in later and reprint the confirmation page if needed
- It is highly recommended to save and print a full copy of your DS-160 application (all pages), not just the confirmation page
- Keeping a copy will help you prepare for your interview and answer questions consistently
Common Mistakes to Avoid
Many applicants make small mistakes that can cause delays or problems.
Avoid:
- Entering incorrect passport numbers
- Spelling errors in names
- Inconsistent work or education history
- Forgetting to save the confirmation page
- Entering incorrect DS-160 confirmation information
If your DS-160 confirmation number or personal details do not match exactly, you may not be able to enter or use your DS-160 information when creating your visa appointment account.
Taking extra time to review your application can save you a lot of trouble later.
What if I make a mistake on the DS-160?
Small mistakes can sometimes be corrected during your interview. However, major errors may require submitting a new DS-160 form.
It is always best to review your application carefully before submitting.
What’s Next?
After completing the DS-160 form, the next step is to create your visa appointment account.
Read next:
- U.S. Visa Appointment Account Creation: Basic Steps for First-Time Applicants (2026)
- U.S. Visa Interview Questions: Common Questions and How to Answer (2026)
Final Thoughts
The DS-160 form may seem complicated at first, but it is simply a structured way to collect your information.
By understanding the process and preparing your details in advance, you can complete the form more confidently and avoid common mistakes.